ERC-20 tokens
Tokens are very popular nowadays, and they are used in a variety of contexts. We will see that it is very easy to create a basic one. To learn more about tokens, I recommend the official documentation here: https://ethereum.org/en/developers/docs/standards/tokens/erc-20/
Prerequisite
To work on this project, you need first an Ethereum account (on a testnet is enough). See this guide if you don’t know how to create one.
ERC-20 token standard
When you create a token, you actually create a smart contract keeping track of token balances. This contract also allows various operations on tokens (like transfer, etc.).
To be a valid ERC-20 token, your contract will have to implement the standard interface defined here: https://eips.ethereum.org/EIPS/eip-20. This page describes all methods and events specified in the standard.
Methods
The ERC-20 standard specifies the following methods:
function name() public view returns (string)
function symbol() public view returns (string)
function decimals() public view returns (uint8)
function totalSupply() public view returns (uint256)
function balanceOf(address _owner) public view returns (uint256 balance)
function transfer(address _to, uint256 _value) public returns (bool success)
function transferFrom(address _from, address _to, uint256 _value) public returns (bool success)
function approve(address _spender, uint256 _value) public returns (bool success)
function allowance(address _owner, address _spender) public view returns (uint256 remaining)
Events
The ERC-20 standard specifies the following events:
event Transfer(address indexed _from, address indexed _to, uint256 _value)
event Approval(address indexed _owner, address indexed _spender, uint256 _value)
Implementation
You can develop your own implementation of this interface, however since most tokens share the same kind of functionalities, some standard implementations are provided. For example OpenZeppelin offers an open source implementation. We will use it as a base for our own token.
Creating our own token
Now let’s create our own ERC-20 token!
Smart contract
Open the Remix online IDE and create the following MyContract.sol:
// SPDX-License-Identifier: UNLICENSED
pragma solidity ^0.8.0;

import "@openzeppelin/contracts/token/ERC20/IERC20.sol";
import "@openzeppelin/contracts/token/ERC20/ERC20.sol";

contract MyContract is ERC20("MyToken", "MTK") {

    uint256 private _total_supply;

    constructor() {
        _total_supply = 1000000;
        _mint(msg.sender, _total_supply);
    }

    function totalSupply() override public view virtual returns (uint256) {
        return _total_supply;
    }

    function decimals() override public view virtual returns (uint8) {
        return 3;
    }

}
It defines a new contract, extending the ERC20 contract defined by OpenZeppelin.
The constructor parameters defines the name (MyToken) and symbol (MTK) of our new token.
We also override the total supply and decimals methods to set custom values.
In this implementation the total supply of tokens will be minted during the contract creation and added to the balance of the contract creator. We will own all the tokens initially!
Deployment
Compile the contract. You can deploy it first on a RemixVM to test its behavior. You should see your locally deployed contract on the left. Clicking on the methods should return the expected values specified in the contract code.

If everything is fine, deploy it to a testnet (in Remix, use the environment Injected Provider - Metamask).
Metamask will ask you to validate the transaction, which should cost a small amount in SepoliaEth.
Wait for the transaction to be completed. You can click on “view on Etherscan” to get details about the transaction.
Once the transaction has been validated, you should see your new contract. In my case it’s been deployed at 0xbfcfde526f4beb7e21887fea79a64e0afe054453
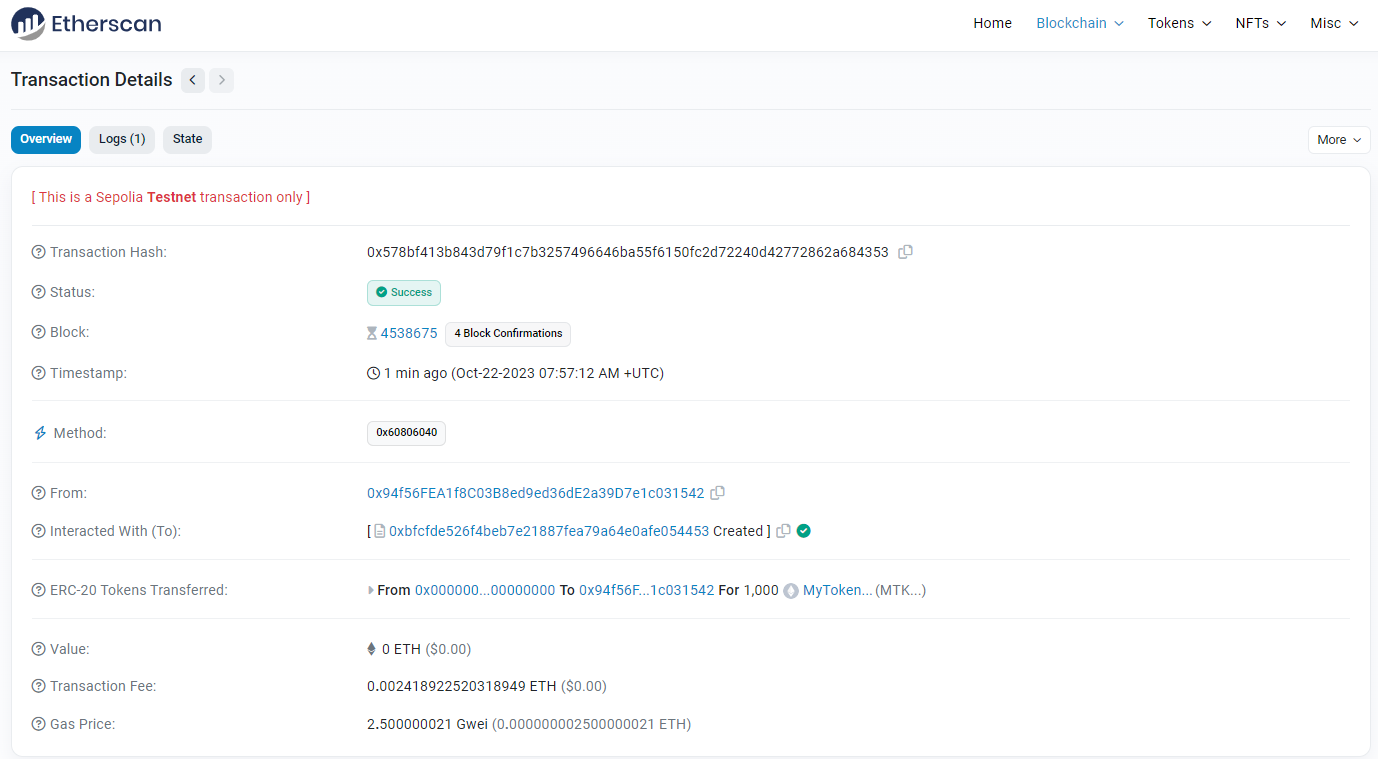
Since ERC-20 is a standard, Etherscan recognize your contract as an actual token, and provides a special page for it: https://sepolia.etherscan.io/token/0xbfcfde526f4beb7e21887fea79a64e0afe054453
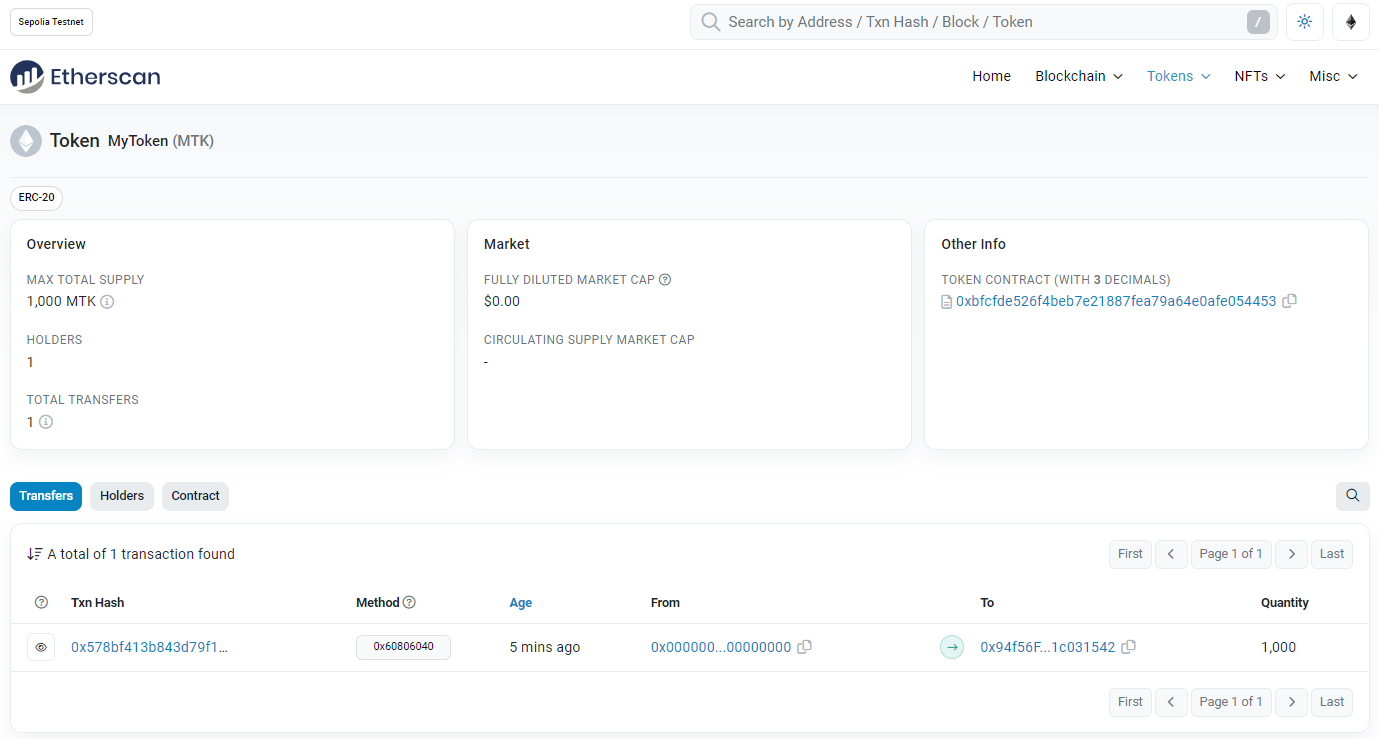
The MTK token exists now on the Sepolia testnet! Only one transfer is present, which corresponds to the original mint specified in the constructor of our contract. The next step will be to exchange tokens with other accounts.
Integration with Metamask
First we will see how to integrate our token with the Metamask wallet. This will simplify a lot the token transfers and allow to have a quick view of our token balance.
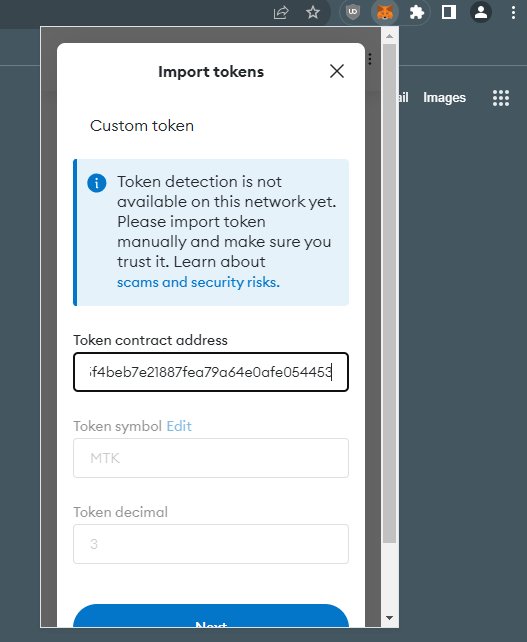
Open Metamask, and click on “Import tokens”. Paste the contract address in the field. It should automatically fill the symbol and decimal fields. Confirm to import the token to Metamask.
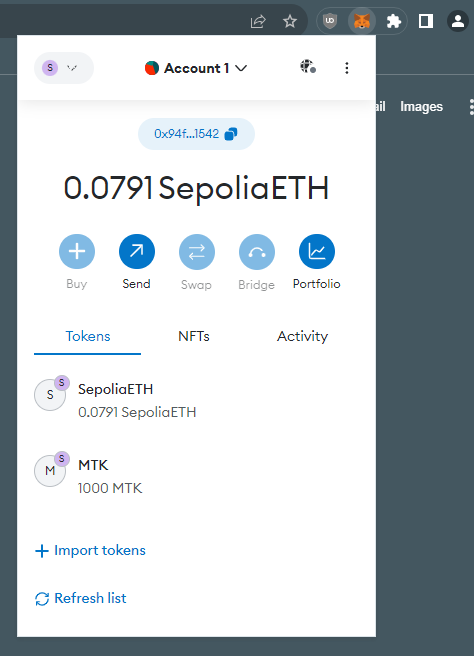
You should now see the MTK tokens next to the other tokens you own.
Transactions
Let’s create a transfer to send some of our tokens to another account. You can proceed exactly like transferring some Eth: click Send, then enter the destination address and select the MTK asset to transfer. We will transfer 150 MTK to our other account:
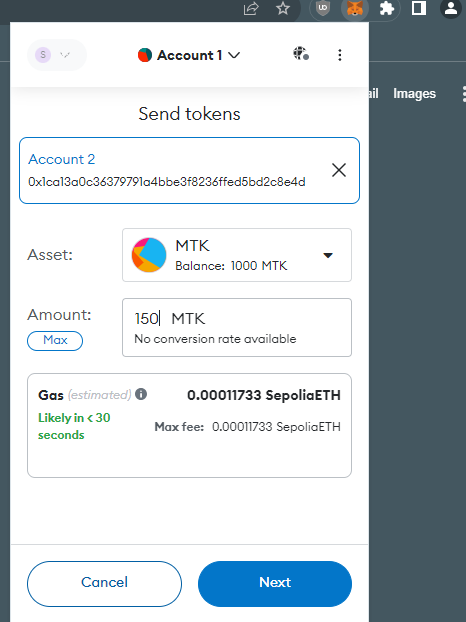
Validate the transaction and wait to the transfer to be confirmed. Only 850 MTK remains on your first account. Then switch to your other account. You will have to import the token in this account as well for the MTK to be displayed (repeat the process we just did before). Then you will see the 150 MTK in this account. Congratulations, it was the first transfer of your MTK token!
Conclusion
In this guide, we saw how to create and deploy an ERC-20 token smart contract on a testnet. We then imported the contract in our wallet and transferred tokens between accounts.
comments powered by Disqus